You may often encounter situations where you need to update or transform engineered wood surfaces. But can you paint engineered wood products (EWP)?
Absolutely! A new coat of paint is a great technique to revitalize outdated engineered hardwood, making a fantastic DIY project for homeowners. It offers an opportunity to create a new look and customize engineered wood according to your preferences.
Before you start painting, it’s essential to learn about engineered wood and how to get the surface ready. This tutorial will walk you through the steps of preparing and painting engineered wood, ensuring you achieve results that are both professional-looking and durable.
How to Prep and Paint Engineered Wood
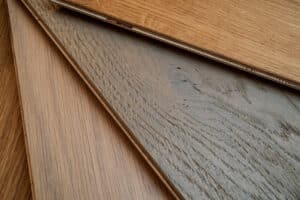
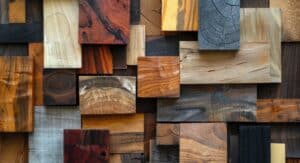
Engineered wood products are safe materials used for building structures. They combine lumber, veneers, wood strands, or small wood pieces with structural polymers to create solid wood products.
Whether you’re dealing with engineered hardwood, engineered wood floors, wooden furniture, cabinets, or composite decking, it’s essential to treat them with the same level of care and preparation.
Proper preparation ensures better paint adhesion and a smoother finish. Let’s break down the process and go through everything you’ll need.
Gather Your Supplies
To begin, gather all the necessary supplies for your painting project. You will need the following:
- Sandpaper (medium and fine grit)
- Sander (if you have it available)
- Sanding block
- Tack cloth or microfiber cloth
- Primer suitable for engineered wood surfaces
- Type of paint for the specific project. Oil or water-based paints are a great choice for long-lasting results. Other options are:
- A high-quality paint color of your choice
- Acrylic latex paint (good for wood composite)
- Semi-gloss
- Paint brushes or rollers
- Painter’s tape
- Painter’s mask or respirator
- Drop cloths or plastic sheets
- Fine-detail brush for intricate or detailed areas that need precise painting
- Wood filler to fix any problems or gaps in the engineered wood before you begin painting
Prep the Wood
For the best painting results on engineered wood, it’s crucial to prepare the surface properly. This applies to various types of engineered wood, such as engineered hardwood, engineered wood floors, wood furniture, cabinetry, hardwood floors, or composite decking.
Once you have gathered all the supplies needed for your painting project, follow these step-by-step instructions to prep your wood:
- Surface Preparation: Thoroughly clean the surface of the engineered wood by using a damp cloth or a vacuum cleaner with a brush attachment to remove any dust, dirt, or debris.
- Sanding for Better Adhesion: Lightly sand the surface using medium-grit sandpaper to create a slightly rough texture, which helps the primer, paint, and wood bond well together. Sand evenly and follow the wood grain. Switch to fine-grit sandpaper for a smoother finish.
- Dust Removal: Wipe away any remaining sanding dust using a tack cloth or microfiber cloth to ensure a clean, particle-free surface.
Apply Primer
Using a primer on the engineered wood ensures the paint sticks well and improves durability.
Pick a primer specifically designed for engineered wood surfaces. This type of primer will seal the wood, prevent any bleed-through, and create a smooth surface for the paint to adhere to. Use a high-quality brush or roller to apply an even layer of primer onto the engineered wood surface.
Add the First Coat
For the best results, paint the engineered wood surface with the first layer.
The kind of paint should be high-quality and suit the requirements of your specific project. Consider essential factors such as the type of engineered wood, the application area, and the finish. We can assist you in selecting the best paint for your needs.
With a paintbrush or roller, spread the first coat of paint smoothly and evenly across the entire surface of the engineered wood. Work on small sections at a time, and make sure to give sufficient time for drying before applying another coat.
Add Additional Coats
You will likely need to apply multiple coats of paint to achieve a durable and professional finish. Remember to:
- Lightly Sand Between Coats: It is important to lightly sand the surface using fine-grit sandpaper once each coat of paint has thoroughly dried. Light sanding will give a smooth and even surface, promoting optimal adhesion between the paint layers. Remember to completely remove any sanding dust before applying the next coat of paint.
- Apply Subsequent Coats: For a professional finish, continue applying subsequent coats of paint, ensuring that each coat has ample time to dry completely before adding the next layer. The number of additional coats needed will vary depending on factors such as the paint’s opacity and the desired level of coverage.
Apply the Finish
Once you have achieved the desired number of paint coats, it’s vital to protect the surface with a topcoat.
Select a suitable topcoat for your painted engineered wood surface. Clear polyurethane, varnish, or a protective topcoat designed for painted surfaces are popular options. Consider factors such as durability, sheen level, and maintenance requirements when choosing the topcoat.
Using a brush or roller, carefully apply the topcoat according to the manufacturer’s instructions. Ensure an even application, following the wood grain, and avoid excessive brush strokes or drips. Allow the topcoat to dry completely before subjecting the surface to regular use.
Contact Us for Help with Your Project
Painting engineered wood is a flexible method to make it look better. By using the right preparation, painting, and finishing techniques, you can achieve impressive and durable results. Transform engineered wood surfaces into stunning elements that elevate your projects.
Now that you have a clear understanding of how to prep and paint engineered wood, it’s time to gather everything you’ll need for your build.
We’d love to help you with your project and gathering construction supplies! If you have any questions or need further help, feel free to get in touch with us.
- About the Author
- Recent Posts

Brad Enfinger has been in construction for over 20 years and has been involved with every material from concrete slab to laying the roof on houses. Brad’s diverse experience has given him the knowledge needed to assist those with shipping building materials, whether it be a house, pole barn, deck, or a dock. Brad at Harbor Exports has anything for your building material needs and can export material all over the world.